How To Make A Vector Based Wild Flower Ditsy Pattern
- Alice Potter
- May 17, 2020
- 3 min read
Updated: Mar 6, 2022
A Step-By-Step Guide to Creating a Simple and Pretty All Over Vector Repeat from Sketch to Final in Adobe Illustrator

1. Research
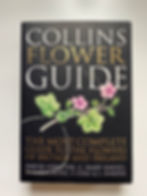
The critical part to starting any new project is the research. When I'm drawing flowers I tend to always reach for my trusty Collins guides. The pocket one is my most loved and always offers me up inspiration when I need it.
You can also do research on the internet with a google search or you can create a visually exciting board on Pinterest
However you do your research, my top advice is to never spend that long doing it, as it eats into time creating. Give yourself a limited amount of time to do the maximum amount of research needed.

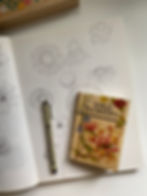
2. Sketching
Or drawing. Whatever you call it and whatever medium you decide to use, this is your time to let loose and use your research that you have done in Step 1 and start creating some art. I have used here a simple Micron ink pen in a standard sketchbook to draw up some line drawings of flowers that attracted me. I focused on the flower heads only and not stems which helped me laser focus on each drawing. This is a good tip if you feel overwhelm drawing flowers. Sometimes the extra bits on a plant can make it seem overcomplicated to draw, but by breaking it down to the flower head, it makes the process more manageable.
Another tip is to always draw more than you need. Fill the page. Fill two pages! If you don't use a drawing now, you may go back to it in the future and it will spark a new idea.
3. Digitising Your Drawing
For this particular pattern I photographed my sketches and Air Dropped them to my Ipad Pro. I then went on to open the sketch up in the app Adobe Draw. I chose this app as I wanted to flowers to be easily editable, and easy to send over to Adobe Illustrator for final creation. You can also vectorise your line drawings if you did them on white paper in black line, or you can redraw them from scratch in Illustrator using the Pen, Blob brush or Pencil tool. (If you are using Procreate or Photoshop, this tutorial is only focusing on using vectors to create my pattern. I will be listing some top classes I know here that may cover these subjects soon)
You can see that I was quite selective in what I redrew in the app. This is because I wanted to focus on the really open style flowers, and I only needed 5-6 different styles. Always draw more than you need (I'll pop this tip in Step 2)

4. Pattern
This is when I start thinking about what goes where and how the pattern is going to look. It's also an opportunity to think about colour. I very quickly changed my palette before getting too far into designing.

I also knew I wanted to make a ditsy pattern which meant making it quite packed and close together with lots of little flower heads. I didn’t want there to be too much background showing through and I wanted the eye to move with ease over the pattern, so think carefully about placement of flower groups.

Remember, what goes at the top, repeats at the bottom, what goes on the left, repeats on the right. (Again, I will be posting a list of classes that may be of use to those of you who don't know how to make a pattern in Illustrator)

5. Final Design
My final pattern came together really easily and intuitively for the design. I think it's because I genuinely enjoyed myself doing it! If you have a go at making a ditsy repeat do please tag me @alicepotterillustration on Instagram

This design will be available to buy in my Spoonflower shop as fabric and wallpaper soon